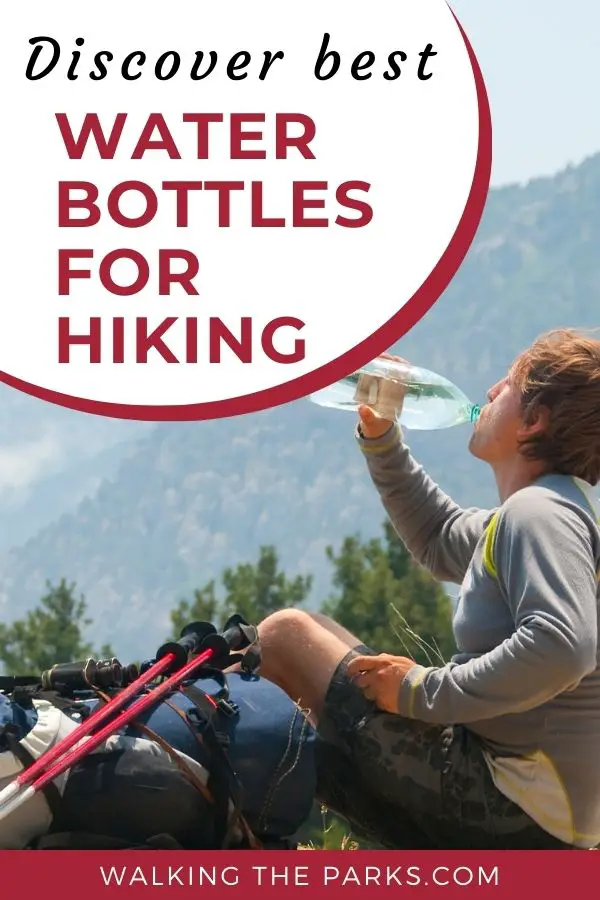
Staying hydrated is key to a successful hike, as every step relies on your body’s hydration level to keep you going. Neglecting to drink enough water can lead to fatigue, or worse, disorienting dehydration. In this guide we explore the best ways to carry water when hiking. Get ready to learn about the latest hydration hacks.
During our decades of short fun hikes, epic day hikes and numerous outdoor adventures we have carried water in just about every type of container you can imagine. I remember packing a glass quart jar of kool-aid on early bicycle adventures (not recommended, LOL). Luckily, Today we have many choices in ways to carry water that are much healthier and efficient. So let’s unpack it!
Types of Water Carriers
We are going to take a look at the two most popular options that strike a balance between convenience and efficiency. Below we’ll deep dive into all the variations of each and explore the pros and cons to help you personalize your choice of ways you want to carry water.
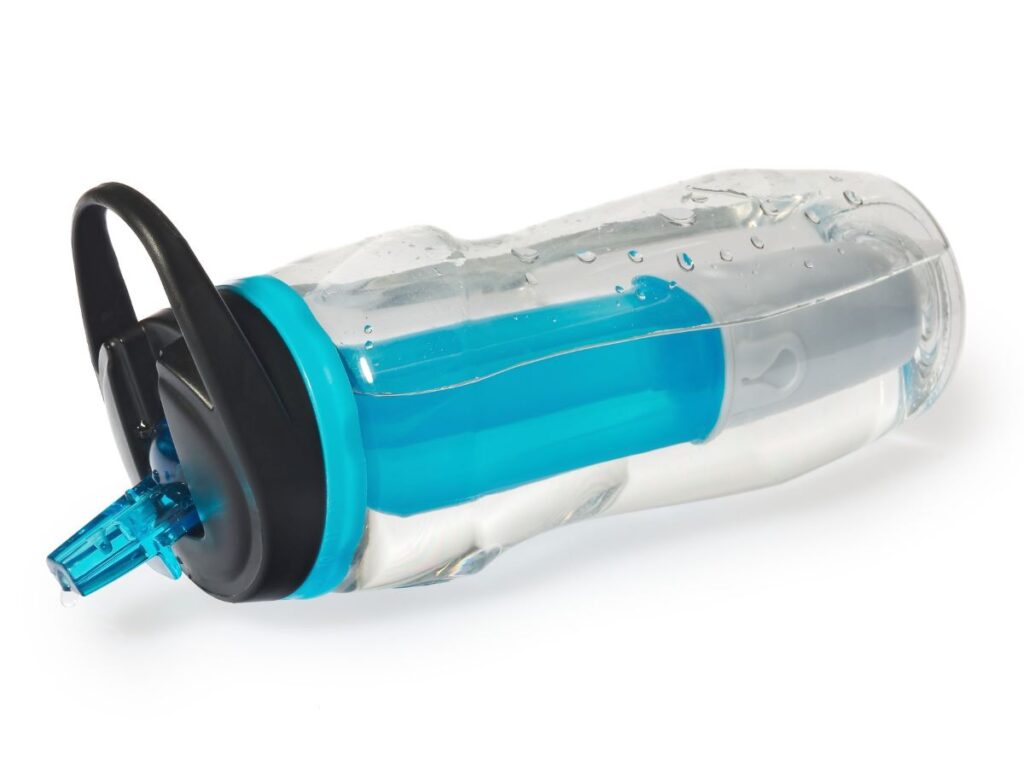
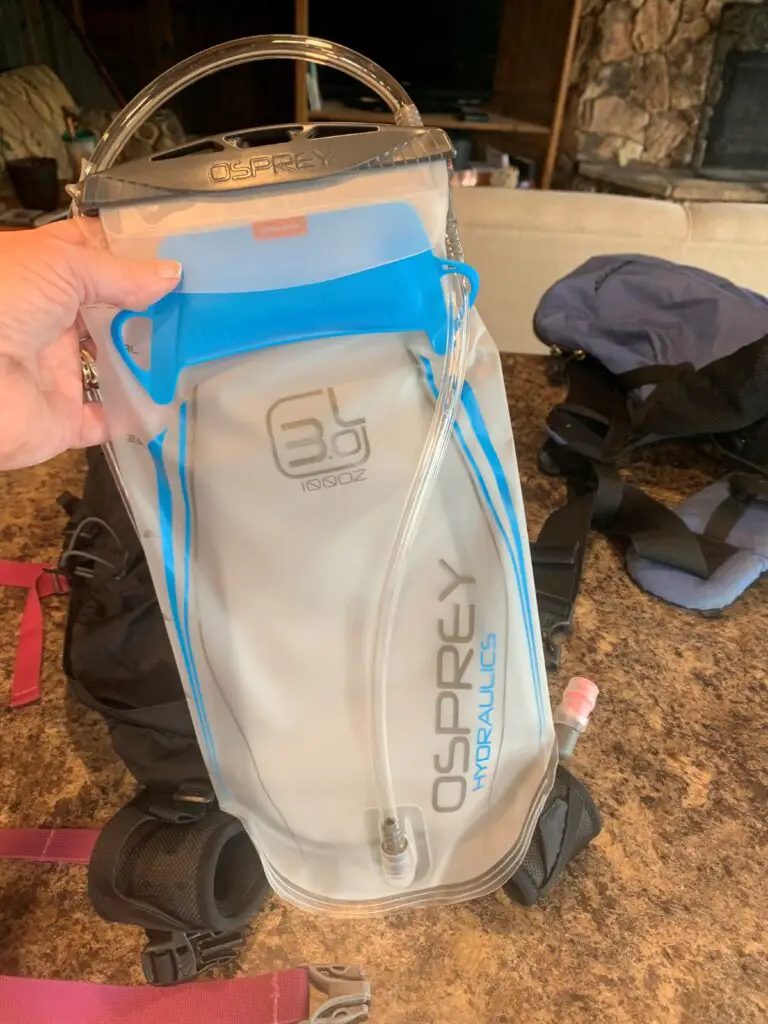
- Hydration Packs are like backpacks with a built-in water reservoir (bladder). You drink through a hose connected to your bladder, which means you can hydrate on the move without stopping. They typically range from 1 to 3 liters in capacity.
- Water bottles are the standard option and come in numerous materials like stainless steel, nalgene, plastic, or aluminum. Some are even collapsible to save space. They’re durable and easy to refill, but can be bulky.
Our Recommendation: Best Way to Carrying Water for Hiking
When it comes to staying hydrated on the trail, the method you choose to carry your water can make a significant difference in your hiking experience.
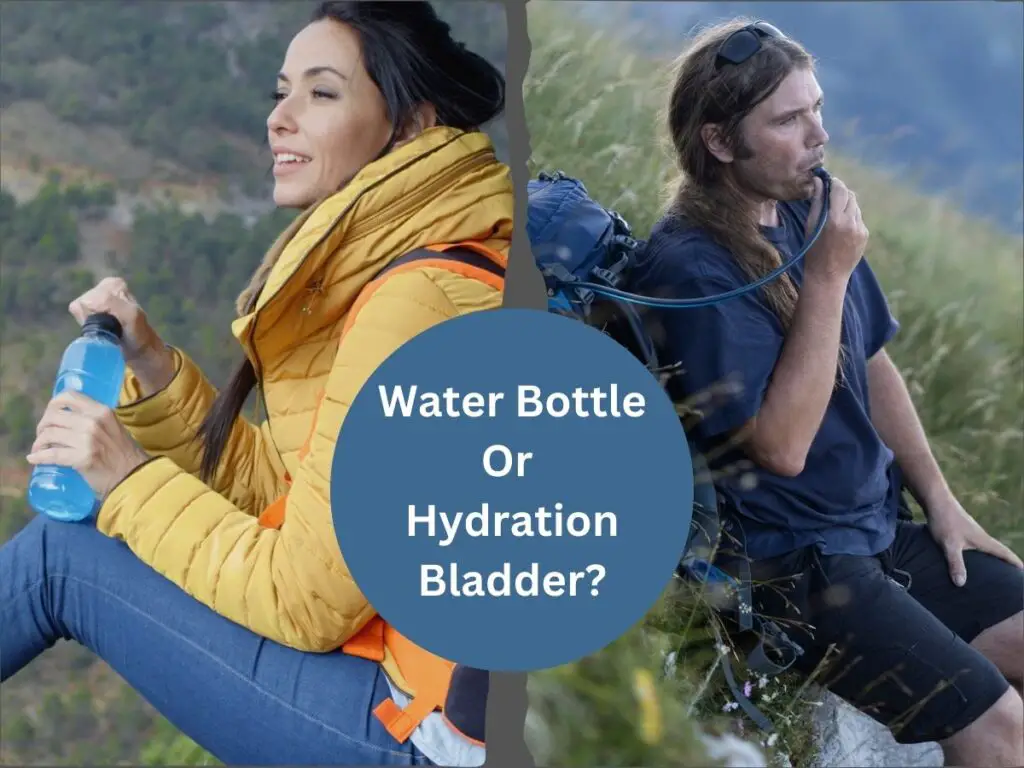
Water Bottles vs. Water Bladders
Our recommendation is that for hiking you need to be flexible and use both hydration bladders and water bottles. Which one depends on the circumstances. In my experience, the amount of water you need to carry and the difficulty of your hike are the primary determinants whether you opt for a water bottle or a water bladder.
When to Use Water Bottles for Your Hikes
For short hikes, when you are carrying a liter or less of water, I firmly believe that a water bottle is the best option.
- Water bottles are convenient, easy to refill, and require minimal preparation.
- They are also easy to clean and sanitize after your hike, ready to go for another adventure.
- They are also incredibly user-friendly; you can quickly grab a bottle, take a sip, and continue enjoying the scenery around you without breaking stride.
- A bottle or two doesn’t require a large backpack, and for a short trail you can easily carry the bottle in your hand, in a fanny pack, or clipped to your belt.
Their simplicity is what makes them ideal for casual day hikes, when you don’t need to carry large volumes of water.
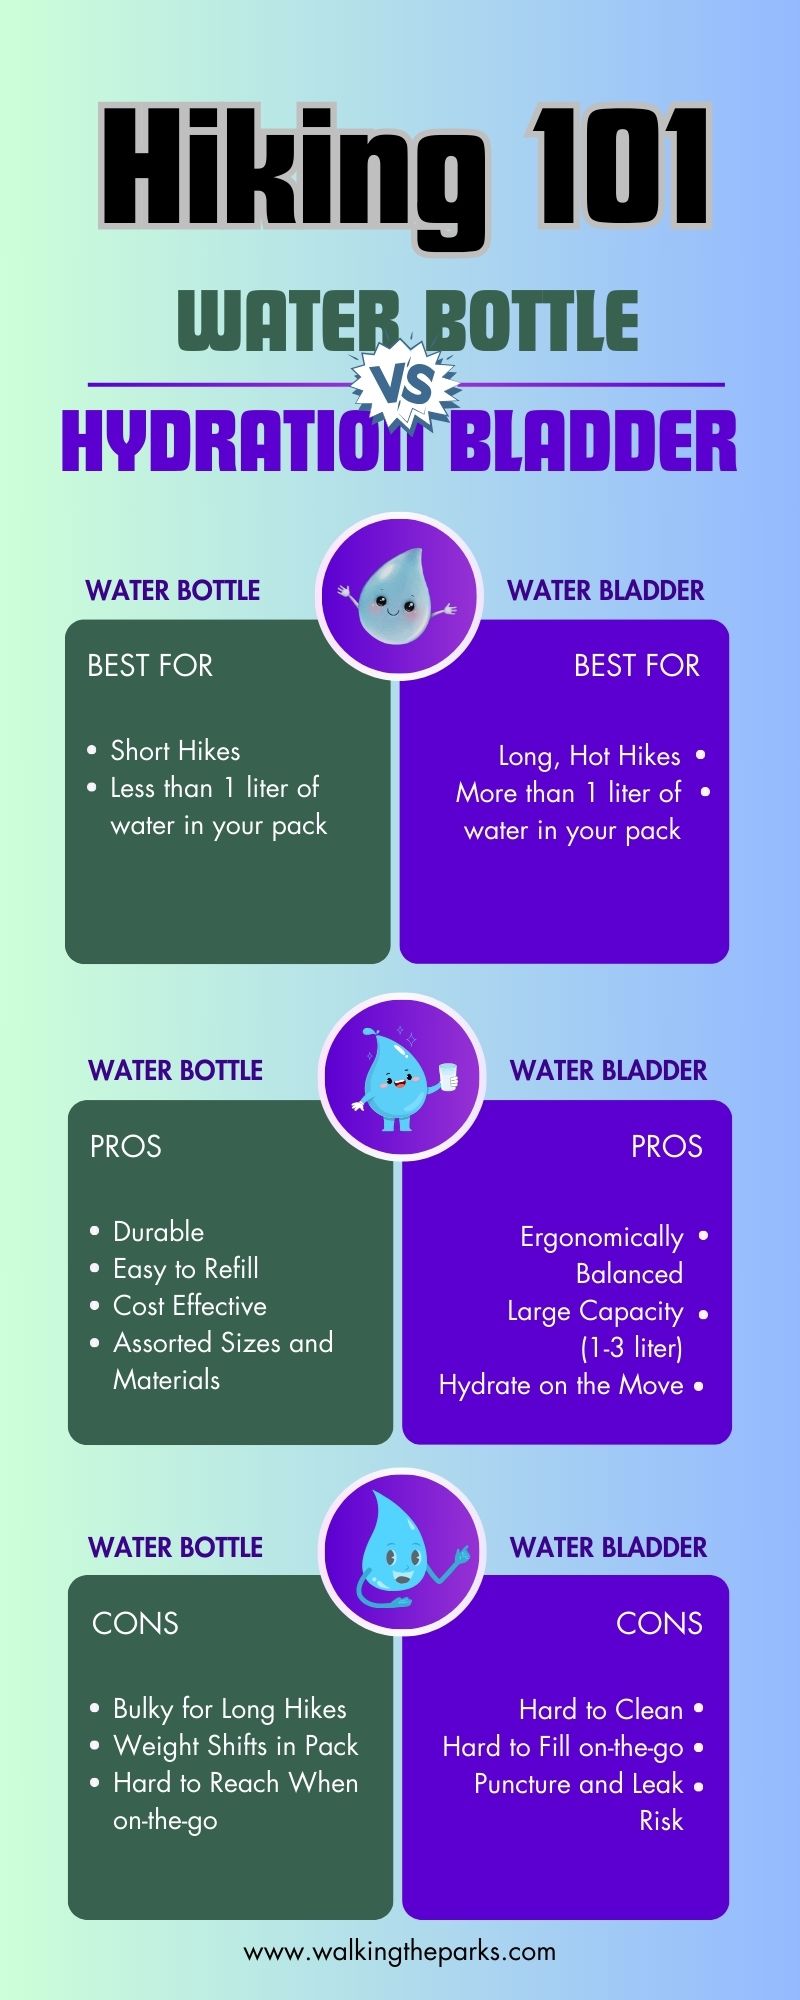
When Hydration Bladders are Best for Hiking
For longer hikes where proper hydration becomes a more critical factor, a water bladder, also known as a hydration reservoir, is my recommended choice.
- Water bladders can carry a larger volume of water—typically two to three liters—without taking up much space in your backpack.
- They allow for hands-free drinking, utilizing a hose and bite valve system, which means you can hydrate on the go without stopping or slowing down.
- The weight distribution of a water bladder is superior, as it sits flat against your back and creates a balanced load. This can significantly reduce the strain on your shoulders and make your pack feel lighter.
And for a really long day of exploring, we found a good way is to use a combination of water bottles and bladders to ensure we are carrying enough water. Your choice will ultimately depend on the length of your hike and personal preference, but considering these factors will ensure you stay well-hydrated on any trail.
Calculating how much water do you need to carry?
Determining the best way to carry water on the trail starts with calculating how much water you will need for your hike. Many hikers switch between bottles and hydration packs depending upon the amount of water they are carrying.
To calculate your water needs, consider how long you will be hiking, the weather forecast, and how strenuous the terrain will be.
Water = Hiking Time x Difficulty x Weather
If you’re venturing out in extreme heat or tackling challenging climbs, be sure to pack extra water beyond your estimate. Remember, you may not feel thirsty until dehydration has already started, so carry more than you think you’ll use and sip regularly to maintain hydration.
Calculating Your Water Needs
Your water needs can vary widely based on temperature, intensity, and duration of your hike.
Here’s a quick reference chart based on recommendations from REI to help you estimate your needs:
| Easy | Moderate | Strenuous | |
| Mild Temperature | .5 liter (16 oz) /hour | .6 liter (20 oz)/hour | .75 liter (24 oz)/hour |
| Warm Weather | .6 liter (20 oz)/hour | .75 liter (24 oz)/hour | .85 liter (28 oz)/hour |
| Hot and Sunny | .75 liter (24 oz)/hour | .85 liter (28 oz)/hour | 1 liter (32 oz)/hour |
Note this is only a guide to get your started. Every hiker’s body has different needs and every trail has different conditions. For example, if you sweat profusely or are a bit out of shape you’ll probably need more water. A very shady trail with a cool breeze might require less water. Hiking in hot weather means your body will use a lot of water compared to hiking in cold temperatures.
After a couple of hikes you will start to fine tune how much water your body needs. Meanwhile it’s better to error on the side of taking more water than you need on a hike.
The World of Water Bottles for Hiking
Selecting water bottles for a hiking trip can be overwhelming. There are so many types and a plethora of well known name brands. I’m going to break down all those options for you here. In the end, your choice of water bottle is personal preference. But we can help you narrow it down quickly once you understand the differences.
Plastic Water Bottles for Hiking
I often lean towards plastic water bottles for hiking, mainly because of their lighter weight and cost-effectiveness.
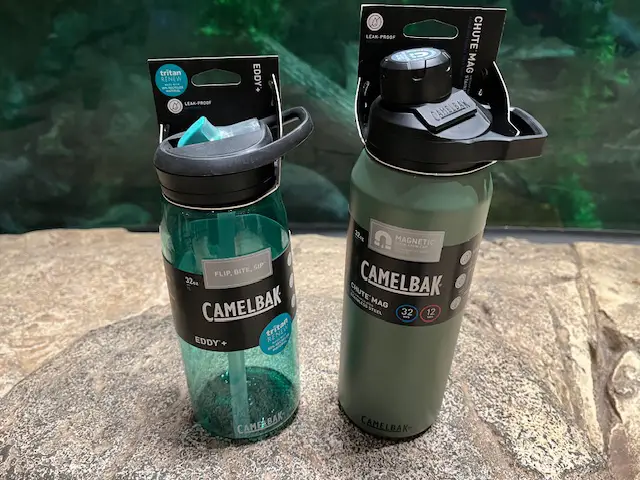
Brands like Nalgene and CamelBak dominate this space with options that prove not only budget-friendly but also resilient. These bottles typically withstand drops and the general wear and tear of outdoor adventures. Their affordability doesn’t compromise their usefulness — a key aspect for anyone assembling gear on a budget.
Their durability means a single bottle can last for years, reducing overall waste. For me, it’s the balance between practicality and performance that makes plastic bottles an attractive option for hikers.
Hard-sided plastic bottles, like the classic Nalgene bottles, are known for their durability and reliability. They can endure falls and bumps without any leaks, making them a solid choice for rough trails. And for hikers looking to minimize their load, ultralight bottles are the way to go. These are typically made from thinner plastic, cutting down on weight without sacrificing too much on resilience.
As a general rule of thumb, we don’t recommend disposable plastic bottles. They are more likely to leach chemicals into your water supply on hot days. And you create a lot of trash in the process. However, if we are on a road trip we will still take a few of these as a back up in case we can’t find a water supply to fill our reusable water bottle.
Pros of Carrying Water in Plastic Bottles
- Lightweight nature which is especially useful when I’m trying to keep my backpack as light as possible on longer treks.
- Durability, these bottles can survive numerous drops and being smashed in your backpack without any significant damage.
- Quite affordable, don’t worry about spending a lot, making them ideal for budget-conscious hikers like me.
- Well Designed with hikers in mind, featuring loops for easy attachment to backpacks and measurements for tracking water intake. Look for bottles that hold a liter of water for the most efficiency.
Cons of Using Plastic Bottle for Hiking
Plastic water bottles, while convenient, fall short in some areas.
- They lack insulation, meaning your drink won’t stay cold or hot for long. This can be a drawback during hikes where temperature control is key.
- Environmental impact. Even though many are reusable, their production and eventual disposal contribute to pollution and waste.
- They can degrade over time and potentially leach chemicals into your water, especially if exposed to high temperatures.
These factors make it clear that while plastic bottles have their place, they also come with considerable downsides.
Stainless Steel Water Bottles for Hiking
Stainless steel water bottles have become a staple for hikers seeking reliability and function on their adventures.
The choices range from sleek, lightweight options meant for the minimalist backpacker to heavy-duty insulated flasks designed to keep beverages hot or cold. I particularly appreciate that they come without the health concerns sometimes associated with plastics, elevating my peace of mind while enjoying nature.
Brands like Hydroflask and Yeti tend to dominate the scene with their insulated options. These bottles excel at keeping your drinks cold for up to 24 hours or hot beverages warm for roughly 12 hours. This feature is incredibly handy for long hikes where a sip of cool water or warm tea can be a morale booster.
Models vary from sleek, lightweight designs meant for easy packing to more robust versions that can handle a few bumps and drops. Insulation is the key advantage here, offering a significant upgrade over plastic bottles in temperature control. While the initial cost might be higher, their durability and efficiency in preserving drink temperatures make them a worthy investment for serious hikers.
Pros of Using Stainless Steel Water Bottles for Hiking
- Exceptional insulation that keeps drinks piping hot or ice cold for hours, no matter the outside temperature. This feature is a game-changer during long hikes, providing you with refreshing sips or warm beverages when needed.
- Their heavy duty construction which means these bottles withstand a lot of abuse without risk of leaking. I’ve used some of our stainless steel bottles for more than a decade of hiking.
- Eco-friendly stainless steel is easy to recycle.
- No chemical leaching as you might experience with plastic bottles.
Cons of Hiking with Stainless Steel Water Bottles
Stainless steel water bottles bring a few disadvantages to the table that hikers should consider.
- Heavier weight stands out as the primary concern, especially when every ounce matters on long treks. This added heft can make them less appealing for those looking to minimize their load.
- Additionally, higher costs can deter buyers on a budget. While their durability and insulation benefits are significant, the initial investment is noticeably more than that of plastic alternatives.
- Furthermore, some hikers complain of a metallic taste in their water. Weirdly, I only notice a metallic taste when drinking from the rim of the bottle. If I drink from a straw I don’t notice a flavor, which makes me wonder if the taste is the metal against my tongue or lips.
Collapsible and Soft Plastic Water Bottles for Hiking
Collapsible and soft plastic water bottles are amazingly lightweight and packable, making them perfect companions on long hikes.
I appreciate their ability to compress down to nearly nothing, saving precious space in my pack for other essentials. And their flexible shape, when filled with water, reduces bulk in a backpack as the shape shifts to the space available.
These bottles are particularly handy for long-distance trekkers who monitor every ounce carried on their backs. Despite their soft nature, many of these bottles offer enough durability to withstand the rigors of the trail.
In the realm of soft plastic and collapsible bottles, two brands stand out: Platypus and HydraPak. Each offers unique designs tailored to the needs of long-distance trekkers and day hikers alike.
Pros of Collapsible Water Bottles for Backpacking
- Space saving design, when you’re not using them, you can simply roll or fold them up, making it a breeze to stash them in your backpack. This feature is a godsend for hikers keen on minimalism or those with limited packing space.
- Ultralight nature means they won’t add unnecessary weight to your load, allowing you to move more freely and cover longer distances without fatigue.
- Affordable, without compromising quality, they offer a practical solution for adventurers looking to economize.
Cons of Hiking with Collapsible Water Bottles
Despite their lightweight charm, collapsible and soft plastic water bottles invite certain drawbacks.
- Puncture risk surfaces as the predominant concern, with their thin material vulnerable to sharp objects. Trails often lay scattered with unseen hazards that can easily breach a bottle’s defense, leading to leaks or complete water loss.
- They lack insulating properties, making them unsuitable for preserving the temperature of your drink. Whether expecting a cool sip on a hot day or a warm gulp during colder treks, users might find themselves disappointed.
- Concerns about chemical leaching is the same as hard plastic water bottles.
Glass Water Bottles for Hiking
Bringing a glass water bottle on a hike might seem counterintuitive at first glance, due to their weight and potential for breakage. Yet, there’s a compelling case for their use.
Glass bottles excel at preserving the taste of water, free from the plastic or metallic tinge sometimes found with other materials. For those of us keen on maintaining the purity of our hydration, this factor alone can make glass an attractive option.
However, even though a glass water bottle is the obvious choice for your health and the environment, it’s hard to recommend one for a long hike. The risk of breakage along with the extra weight are not appealing on a long hike. Most outdoorsmen only use glass bottles for short hikes or camping.
Pros of Glass Water Bottles on a Hike
- Purity of taste they offer is the biggest benefit of glass bottles. Unlike some plastic or metal options, glass doesn’t impart any flavors to the water
- Eco-friendly glass is fully recyclable and can be reused countless times without losing purity or quality, making it a great choice for reducing environmental impact.
- Easiest to clean as glass bottles can withstand sterilization at high temperatures. Just drop them in the dishwasher when you get home, an action known to cause faster degradation of plastics.
Cons of Glass Bottles on the Trail
Despite their appeal, glass water bottles come with significant drawbacks for hikers.
- Fragility is the most obvious concern for hikers. The top glass water bottles for hiking are wrapped in a silicone sleeve to protect them from drops. However, for long hikes it is still a high risk that you would be without a bottle if it breaks.
- Additionally, weight poses another disadvantage. Glass is inherently heavier than materials like plastic or stainless steel, adding unwanted pounds to a hiker’s load.
Filtering Water Bottles for Hiking
Filtering water bottles are game-changer for hiking on trails with streams and rivers. These bottles come equipped with a built-in system to purify water, allowing you to drink directly from natural sources.
What stands out to me is their convenience. No longer do you need to carry extra purification tablets or a separate device. With a bottle like the Katadyn BeFree Water filtration system, you just fill, press or sip, and the water is ready to drink.
The safety aspect cannot be overstated. Drinking untreated water can lead to serious illness. Filtering bottles remove bacteria, protozoa, and sometimes even viruses, reducing the risk of waterborne diseases.
The only catch is maintenance. Regular cleaning and filter replacement are necessary to ensure the bottle functions properly. Despite this, the benefits far outweigh the minor inconvenience.
Katadyn BeFree, LifeStraw Go and Grayl Ultralight are popular brands that deliver clean water in just seconds.
Pros of Filtering Water Bottles for Hiking
Filtering water bottles bring several standout benefits to the table, making them a preferred choice for many hikers.
- The convenience they offer is unmatched. Instead of carrying heavy water supplies or worrying about locating water sources, simply fill your bottle from nearly any stream or lake and drink safely. This simplifies planning and packing for trips.
- Safety aspect is crucial since these bottles remove harmful pathogens, ensuring you stay hydrated without risking waterborne illness.
- Insurance is key, even when you believe fresh clean water will be available on a trail, carrying a filter bottle ensures you won’t be surprised.
Cons of Filtering Bottles for Hikers
Filtering water bottles offer a fantastic solution for accessing clean water on the go, but they come with their own set of challenges.
- The need for regular maintenance. Keeping these bottles in optimal condition requires frequent cleaning and sometimes replacing the filter, which can be time-consuming.
- Extra pack weight, filtering water bottles tend to be heavier than their non-filtering counterparts.
While the advantages of having access to clean water cannot be understated, it’s essential to balance these benefits with the added responsibilities and weight that come with filtering water bottles.
Using a Hydration Bladder for Hiking
Hydration bladders can be amazing for long days of adventure due to the ease of carrying a large amount of water they provide.
But I’m also going to share a lot of challenges with water bladders that sometimes drive me crazy. However, in spite of all of the issues, if I’m going to be exploring for a full day I’d rather carry a hydration bladder. Why? For me it’s the benefit of the weight distribution. My back feels healthier after a long day of hiking when that 6 pounds of water is spread properly across my back than as dead-weight tugging in the bottom of my daypack. (3 liters of water weigh 6.6 pounds)
How Does a Hydration System Work?
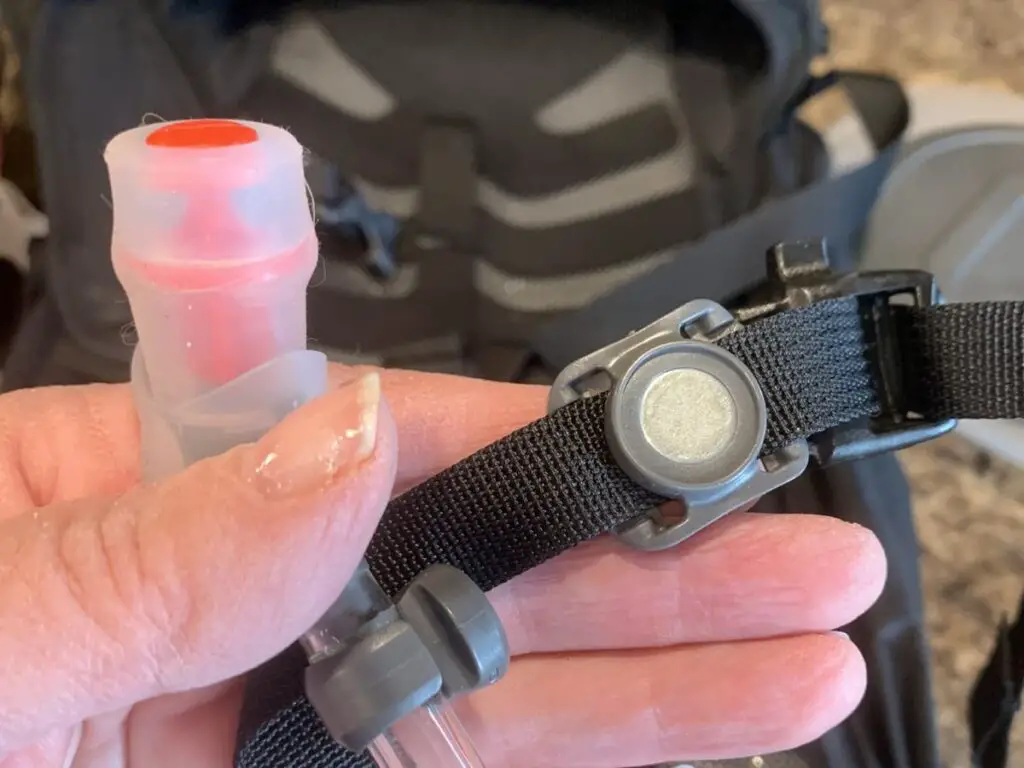
I’ll admit, it’s pretty genius. A typical hydration system consists of a reservoir to hold water that is often called the water bladder. Its basically a durable, water-tight bag. There is a hose attached to it which lets you draw water from the bladder. The hose works like a giant straw. The hose typically ends with a bite valve. This valve opens with a bite and a suck, sealing up again when you stop biting to prevent leaks. There’s usually a cap to keep the reservoir clean, and often a clip on the hose to attach it to your backpack for easy access.
Most hiking backpacks are compatible with water bladders. That means they have a separate pocket that holds the bladder snug against your back. They usually have a hook or clip to keep the bladder firmly in place.
Benefits of Hiking With a Hydration Bladder
- Convenience: Most distance hikers find the convenience of having a sip tube always within reach means they can drink water without breaking stride. Because it is easy, they more consistently hydrate which helps maintain energy levels and reduces the risk of dehydration.
- Capacity is a big plus, too. Water bladders come in various sizes, often holding up to 2-3 liters, which is sufficient for extended treks without frequent refills.
- Weight distribution matters when I’m covering rough terrain. A hydration system provides even distribution of the weight of the water across your back, making your pack feel more balanced compared to shifting and bulky water bottles.
- Reduced environmental impact. Using a reusable system cuts down on plastic waste from disposable bottles. Plus, it’s easy to refill at water sources along the trail.
Hydration bladders are all about hydrating smarter, not harder.
Potential Problems When Using a Hydration Bladder for Hiking
While hydration bladders are a game changer on long days, here are a few snags I’ve come across:
- Remembering to Clean is my top issue. I’ll share a picture of my gross bladder when I forgot to dry it out after a long road trip. I didn’t remember it until we had been home for a week and I don’t think I can ever get it clean. These things are a breeding ground for bacteria and mold if you’re not diligent.
- Ease of drying out the hose and bladder, it can be a real hassle. A lot of hikers swear by popping their water bladders into the freezer between hikes to avoid mold growth.
- Leaking from a loose hose connection or a puncture.
- Sometimes, the water tastes like plastic. It’s a turn-off when I’m craving a cool, fresh gulp.
- Too Much Capacity for short day hikes. If you don’t need to carry 2-3 liters of water a bottle is often easier.
- Hose Issues: The hose can freeze in cold weather (bummer for winter hikes) or it can get in the way when I least expect it.
Practical Tips for Carrying Water
When you’re packing for a hike, knowing how to carry your water can make the difference between a burdensome trek and a comfortable adventure. Let’s talk specifics.
Balancing the Load
Balance your pack to reduce stress on your back. If you’re using water bladders, place them close to your back and centered between the bottom and top of your pack. For water bottles, evenly distribute them in side pockets or use a harness to attach them to the outside of your pack.
Preventing Leaks and Spills
Nobody wants a wet backpack, so check your caps and lids before you set off. If you’re using a bladder, make sure the hose and connection points are secure and leak-free. It’s also smart to carry a small repair kit—a few patches can go a long way if your water bladder springs a leak.
Each family member should carry their own bottle so you can monitor intake.
Especially when you have kids along, it’s hard to be certain everyone is drinking water consistently when you share water. Great advice is to give each child their own kid-sized water bottle so you can monitor the volume they consume. You can refill it from water sources you are carrying.
Drink consistently, even if you are not thirsty.
According to John Hopkins, “Dehydration can sneak up on both adults and children, especially when they’re exerting themselves. Waiting until you’re thirsty to grab a drink may be short-changing your hydration needs”. They suggest marking your water bottle with drinking goals for the day to ensure you are drinking consistently.
Use Fruits to Help You Hydrate
Fruits like oranges, grapes and peaches are mostly juice which will fulfill some of your hydration needs in a yummy way.
High Altitudes Require More Water
Carry extra water when hiking at higher altitudes. First, the air at high altitudes is drier which in turn dries you out. Plus, you body has to work harder to hike in the thinner air.
Purifying Water When Your Hiking
Drinking water straight from a natural water source may invite unwanted guests in the form of pathogens. Your defense? A solid purification plan, featuring tools that eradicate bacteria, protozoa, and even viruses with a few simple steps.
Water Purification Methods
When you’re out on the trail, having a reliable method to purify nearby water sources is critical. You’ve got several methods at your disposal, each with its own set of pros and cons that you’ll need to consider based on your situation.
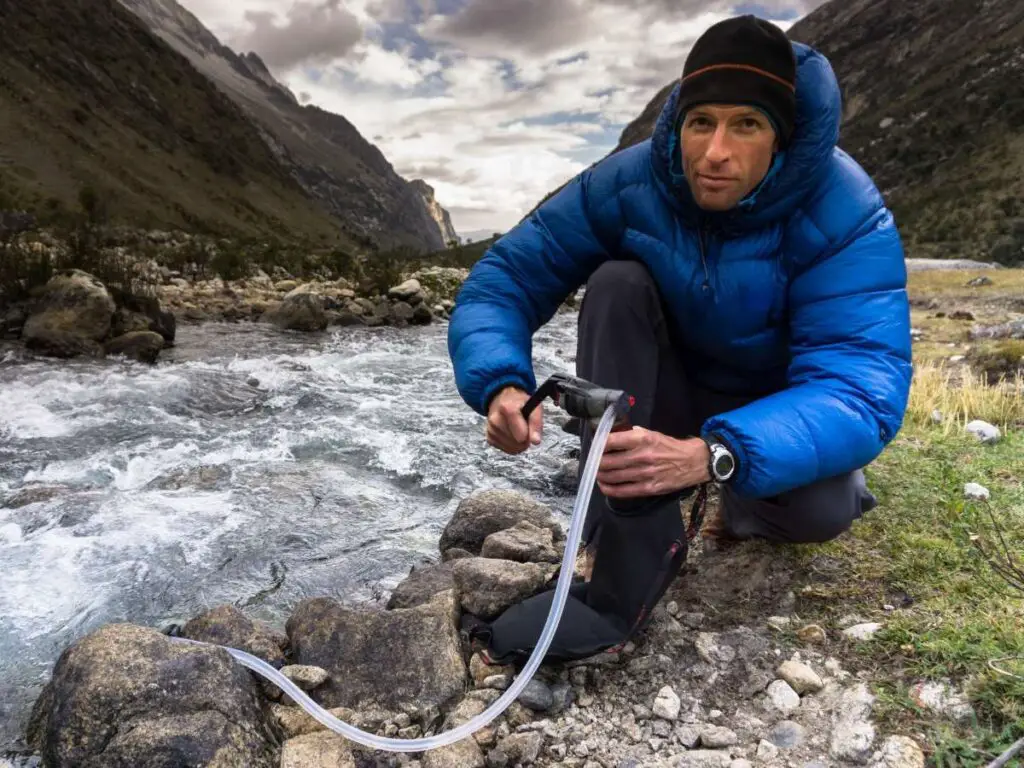
Water Filter Systems
Systems to filter water have grown to be the most popular method to purify water when away from clean water sources. They are easy to use, clean water quickly, and provide healthy water with a fresh taste.
The biggest downside to filtering systems is that most add bulk to your pack. And it’s also critical that you clean and replace filters regularly.
Filter systems include pump filters and squeeze or gravity filters. They are great at removing sediment and pathogens. Here’s what you should know:
- Pump filters offer quick access to purified water and can filter from shallow sources.
- Squeeze or gravity filters need no pumping, but you must fill up a bag and wait as water drips through the filter.
We used a Katadyn pump on a long weekend in the boundary waters and found it so simple to use.
We also each carry a LifeStraw in our backpack no matter how long or short the hike. That little piece of plastic ensures that we can get water if our day falls apart. The one time Brad didn’t take it with him… that was the time a short hike turned into an all day adventure and he severely suffered from dehydration.
UV Light Purifiers
UV light purifiers are effective and fast at killing bacteria, viruses, and protozoa. To use, stir the device in your water for a few minutes as per the manufacturer’s instructions. However, remember that:
- Your water container should be clear as UV light can’t penetrate through murky or sediment-filled water.
- These purifiers require batteries or charging, so plan your power supply accordingly.
Chemical Treatment
Chemicals, such as iodine or chlorine, are lightweight and compact options for purifying water. You simply add the recommended amount of drops or tablets to your water and wait the directed time—typically around 30 minutes—before it’s safe to drink.
Chemical treatments tend to be the last resort these day for purifying drinking water on the trail because of the nasty taste. Even so, I keep a few iodine tablets in my first aid kit because you never know what will happen in the wild. I’ve never used them and hope I never do.
Sips and Trails: Our Final Refresh
As you can see, the best way to carry water while haking varies, depending upon if you are planning a moderate hike or a strenuous hike. And adjusting for the length of you hike. Once you know how much water supply you need, then you can make a choice.
When exploring the great outdoors, no matter which method you choose to carry your water make sure you carry more than enough to ensure a safe and comfortable hike.